Raspberry Pico Pi Hardware Sequencer with custom IO board
The IO board is using a MCP23017 16 bit port expander to control a matrix of pushbuttons and LEDS. The Raspberry Pi Pico has enough GPIO pins to handle a small keypad like this but I wanted to try out the MCP23017 to see what kind of performance I can get out of a I2C interface. The Yamaha Reface DX is connected via MIDI and as you can see in the video, I can load a midi file from the SD card and play it back on the Reface.
Now that the initial H/W prototype is complete, most of the remaining effort will be firmware development.
0 thoughts on “Building a Hardware MIDI Sequencer – Update”
lb says:
Well done!! Congratulations!
Where do you put your SD card?
jk says:
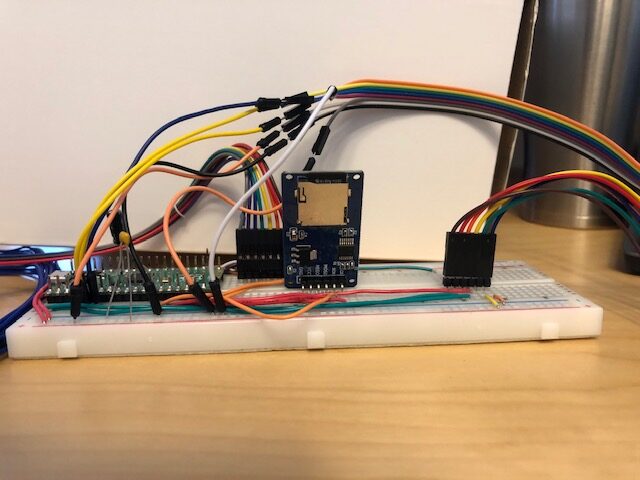
It is kind of hard to see the microSD card shield from the picture. Here is the side view where it is easier to see the microSD card shield.
lb says:
Oh! I can see it there. Thank you!
If you don’t mind please share the source code of firmware via gitHub or something else. I’m very curious to know how it will be implemented.
jk says:
Once I get it to a point where I can share it, I will post it someplace. Right now, I am working on a Raspberry Pi Pico MIDI synthesizer to use as a sound source for the sequencer.
lb says:
Well done!! Congratulations!
Where do you put your SD card?
jk says:
It is kind of hard to see the microSD card shield from the picture. Here is the side view where it is easier to see the microSD card shield.
lb says:
Oh! I can see it there. Thank you!
If you don’t mind please share the source code of firmware via gitHub or something else. I’m very curious to know how it will be implemented.
jk says:
Once I get it to a point where I can share it, I will post it someplace. Right now, I am working on a Raspberry Pi Pico MIDI synthesizer to use as a sound source for the sequencer.